Instructor Ronn Campbell Focuses on Practical Skills Along with Lighting Design Theory
Many in our business will debate whether a proper theater school knowledge or the tried and true School of Hard Knocks is the best way to get one’s self into the business of becoming a stage technician. Whenever I’m asked, I simply bring up a possible situation. Say you run a business and you need to hire an employee. Are you more apt to hire the guy with the great attitude who knows nothing, or would you rather hire someone who knows how to prep a rig? Most employers would choose the person with a bit of knowledge.
Not a month goes by where I don’t see someone inquiring about how to get in the lighting business. Working for a lighting vendor so you can earn while you learn may be the optimum way, but getting your foot in the door is not as easy as folks claim. It’s a lot easier to get that foot in if you can tell the employer, “I know how to hang, circuit and patch a lighting system.”
Now it’s true that some schools offer lighting design programs, and I have seen several intelligent people go very far with the knowledge they learned there. But schools like Full Sail, Carnegie Mellon and Ivy League places may cost $100K by the time you graduate. Other great schools such as Ithaca College or Webster in St Louis may cost less, and you will indeed come out of there as a smarter, well rounded person in the art of theater. But what if you just want to learn some basics, like how stuff works and the principles of lighting? Well, in that case, maybe you need to meet a guy like Ronn Campbell, who teaches theater out of a small school in remote Pasco, WA called Columbia Basin College.

Ronn is currently a senior associate professor of theatre who holds a MFA in design from Humboldt State University (Arcata, CA) and BFA in design from the University of Idaho in Moscow, ID. Ronn has designed scenery, lighting and sound for Snowy Range Summer Theatre (Laramie, WY), Washington East Opera (Richland, WA), CBC Summer Theatre (Pasco, WA), Mid-Columbia Regional Ballet (Richland, WA) and Idaho Repertory Theatre (Idaho Falls, ID). Ronn served as DTM Chair for Kennedy Center American College Theatre Festival (KCACTF) Region VII, USITT Northwest Section Chair and KCACTF National Member-at-Large. Ronn has received several awards for his designs and was awarded the Kennedy Center Medallion in 2012. As he has aged, he realized his passion is for teaching the next generation. “My goal is to make sure there’s another generation of techs as well as lighting designers out there.”
Campbell acknowledges that very few people walk out of college and get a job as a lighting designer right away. While it does happen to a few very sharp people, the majority need to start their careers by hanging lights. “I was raised in a place where our high school had a good theater department. I met the Felton twins there (Glenn and Russ who are well known TDs/production managers today), and we caught the theater bug. When they went out as young men on tour with musical acts, I tagged along for a while. Did some local shows loading in with crews, then moved on to touring with musical acts. But I enjoyed the theater aspect of the lighting business more than the musical side, so I went in another direction. I realized that one can only swing a hammer for so long, plus I wanted to teach the skills I had learned.”
Designing (and also Building) the Rigs
He started teaching classes while he was still in grad school, because it was his passion. He wanted others to have the same opportunities. For years, he honed his trade at other classes, workshops and judging on the KCACTF as well as USITT panels. But Campbell had a different idea in mind for instructing students. “I found that plenty of schools teach theory, which is great in lighting. But when we would go to the first hang at a theater, everyone kind of stood around waiting to be taught what to do, instead of already having a bit of knowledge and just executing the lighting hang. So, I started incorporating actual lessons on how to build lighting rigs, as well as design with them, into the program.”
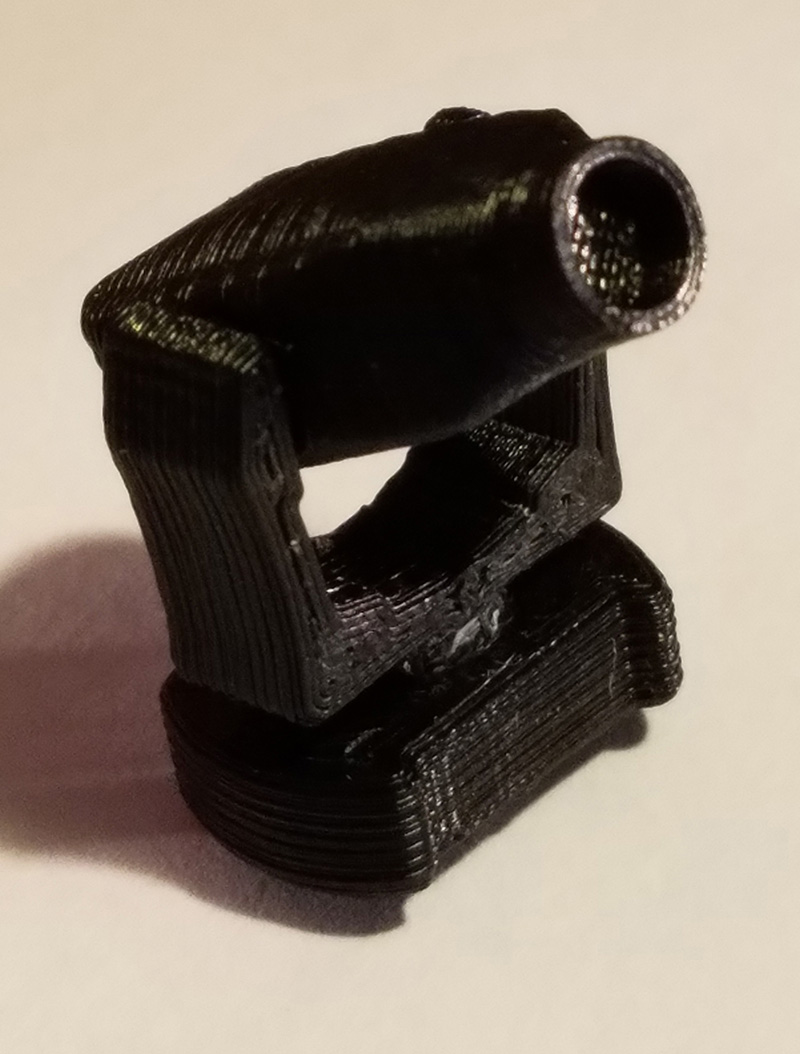
One of the biggest changes in his whole teaching philosophy came about when he obtained his first 3D printer a couple years ago. “I was just messing around with things that I could make, and I thought to myself, ‘What if I could make an ETC Source Four fixture?’ The dimensions were all on the website, so it wasn’t that difficult.” Mind you, the teacher is versed in AutoCAD, an expensive program he was taught in college. Building 3D symbols was not new to him, but printing them was.
“I ended up building a library of all the gear we owned at the school and printing it out in half-inch scale. It was a steady practice, and as I started building my inventory I realized that I could teach more and more practical lessons on loading in, rigging, circuiting and so much more.”
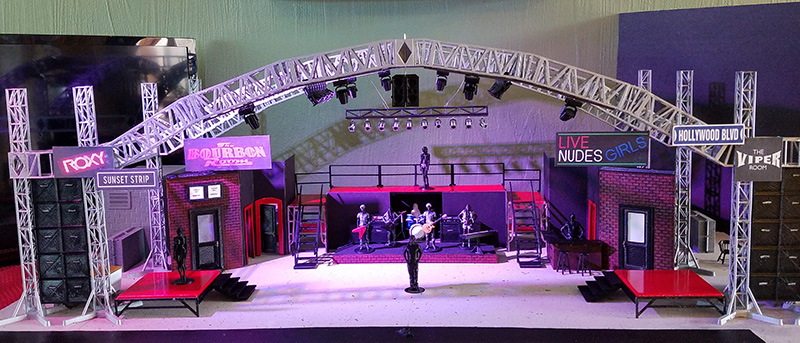
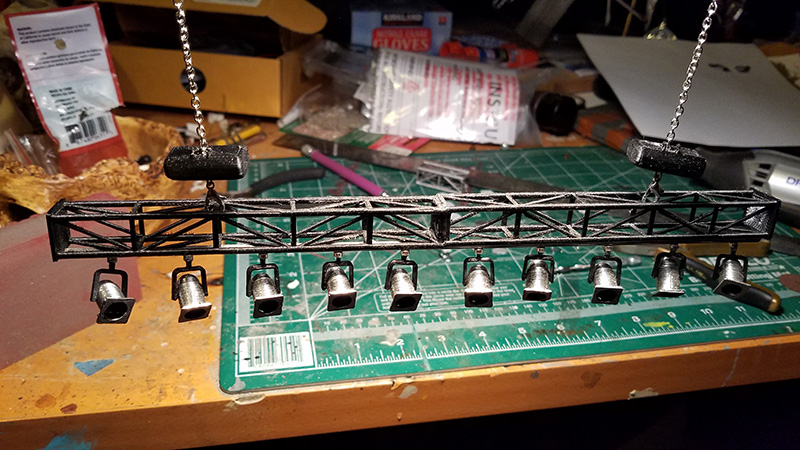
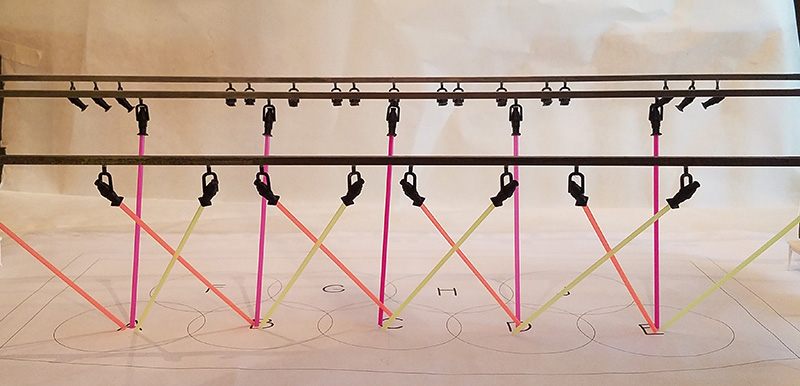
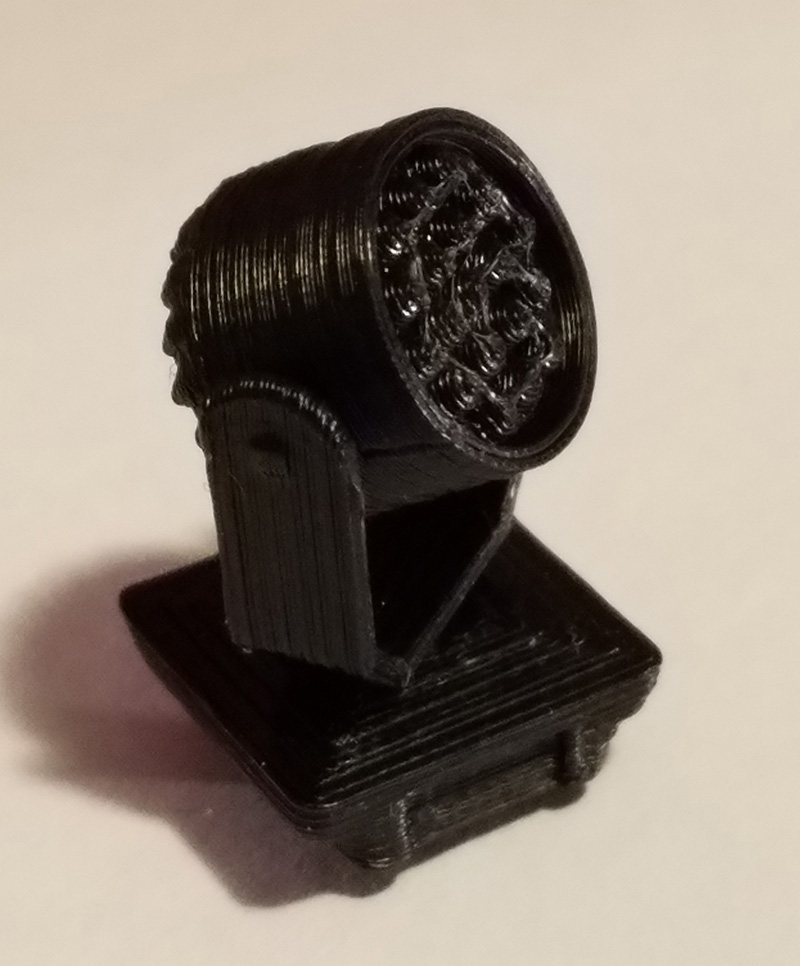
For his classes, he built some 20-inch box truss. He then took his fixtures and attached magnets to them. He glued a strip of metal to the underside of the truss that the magnets could attach to and taught students about proper placement of fixtures when illuminating a focus area. He 3D-printed models of moving light fixtures, Par 64’s and even road cases for the gear. When asked why he would bother with road cases, his answer was direct and simple. “Nobody ever teaches these kids how to load a truck. I want them taught properly. How to stack truss or put it on load bars. All the cases are standards you see with most rental companies. Cable trunks that flip on end three across with light boxes on top.” How else is a bunch of kids on their first gig going to figure out the most efficient way to load a truck? This is all sounding like Legos meets Tetris.
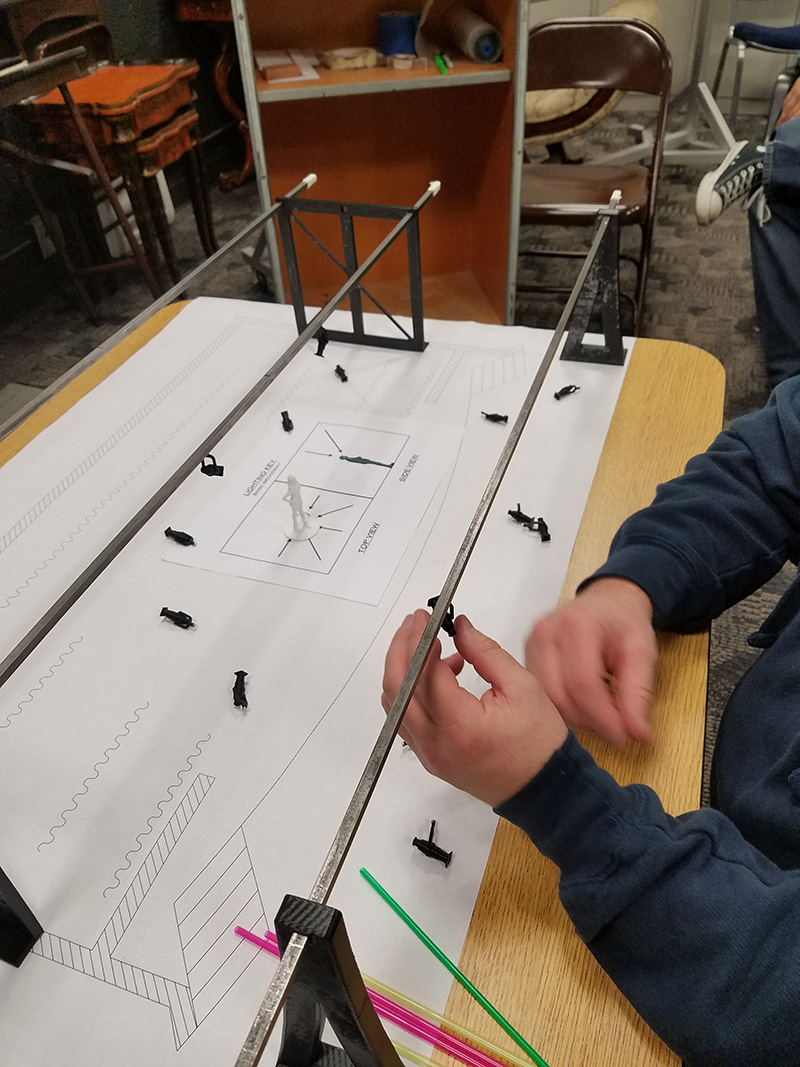
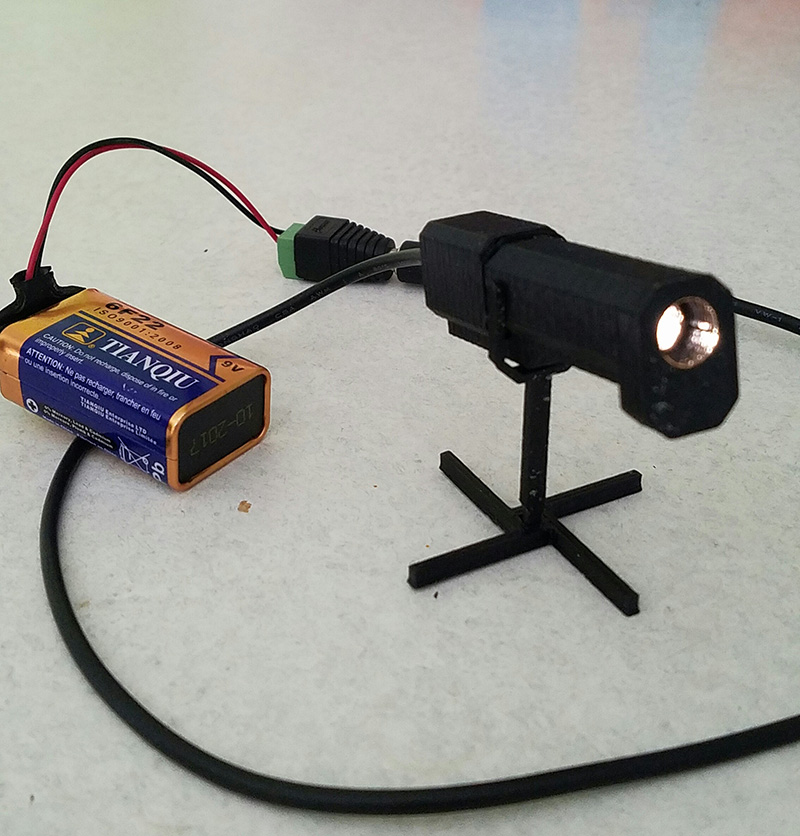
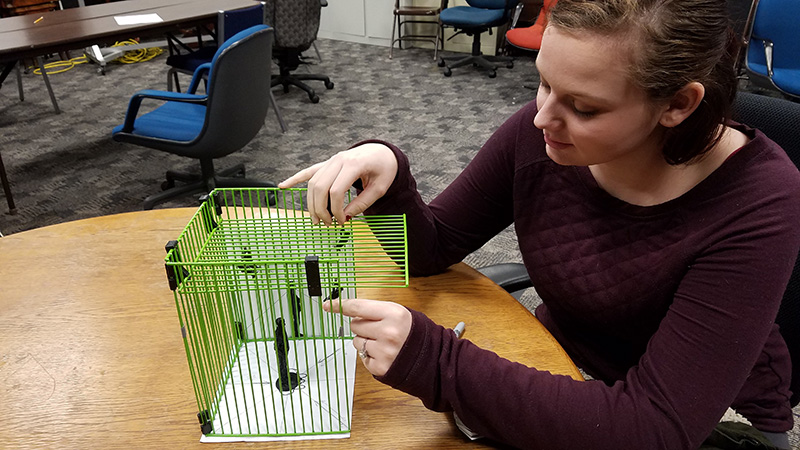
For a similar reason, he built copies of Super Trouper followspots. “I decided that it would benefit the kids to be able to see light coming out of them, so I installed a little Gantom LED in the tube and it worked off an app I installed. With these lights, I was able to teach a lesson on the importance of followspot placement for different performances. I also taught lighting techniques by using bird cages as a grid. I could put a scaled model of an actor on stage in the cage, and show how illuminating the actors from different heights and angles with my lights worked to the eye.”
Campbell designed a self-climbing ground support system of trusses for a roof. This was noticed, and now the school owns an Xtreme Structures self-climbing roof that was graciously donated by a local resident to be used in their outdoor amphitheater. They also own a Skjonberg motor controller and electrical hoists. “Someone asked me to make some CM’s with chains to rig our trusses to the 3D copy of the Xtreme roof. I realized this was a valuable time to teach a little rigging. Safety concepts, making baskets, proper bridles to hit points straight on, spanset to truss rigging. All the knowledge that they might not retain while learning on a site, I could teach in advance.
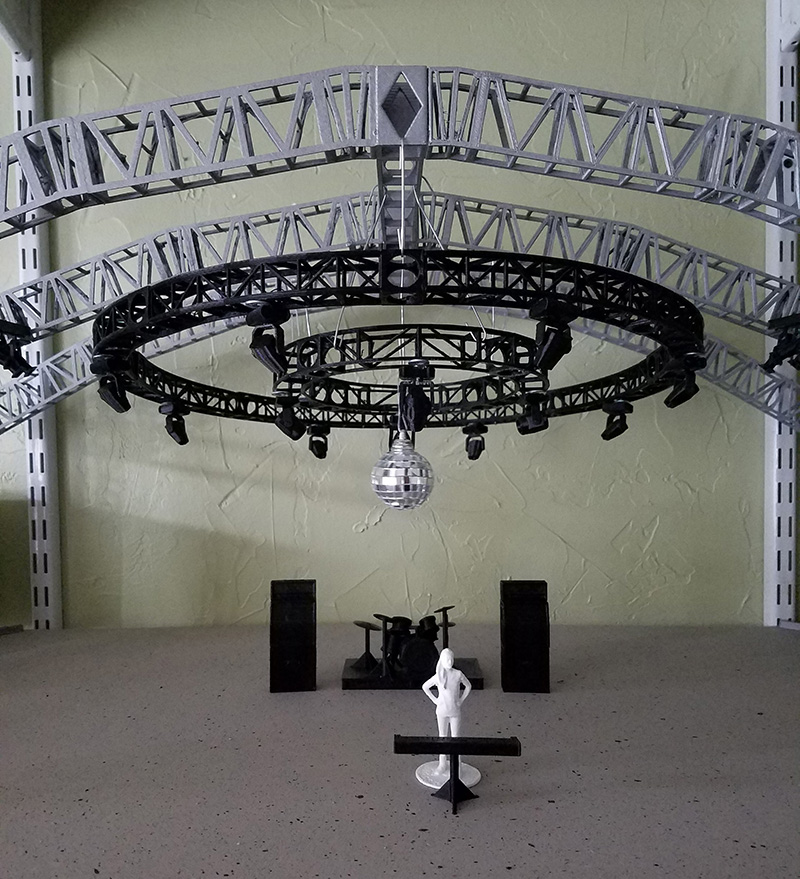
“It’s important to instill the fear factor and safety of what rigging is all about,” Campbell continues. “With models, I can show them what happens when one motor stops and the others keep going up. Another great thing about the models is the height factor. Students will naturally be frightened when they go up in a lift or lean over a catwalk to focus for the first time. We cover all of this while still on the ground, looking at models. It’s hard to learn something new if you are a little concerned over heights, as most of us are the first time we go up there.”
“My goal is to get the info on how to work on a stage to the students, before they walk onto one,” Campbell adds. “Even if you are interning at a company, you have to learn the basics. We try to ready our students with as much practical info as well as lighting theory, because we think the better we educate them, the better our lives will be in the future. I try and make our students as marketable as possible. If they have a bit more knowledge than the new guy walking in the door they are more valuable. I have students of mine working in theaters, on cruise ships and some on the road.”
Ronn adds, “I recently printed up some Technobeams and Cyberlights. I realize that scanners are old technology, but the students should learn about them anyway, they may run into them one day. Another professor asked for a Beam Projector, so we made one of them as well.”
But what about cable and circuiting, I ask. “Teaching the fundamentals of electricity and how to wire lighting systems is very important. I use different colored string to show different cables and what they can do. A Black string may be a socopex that is terminating with a six-circuit fanout. This teaches the students how many lights we can run on each cable. We have different colors for different cables, whether they be jumpers, two-fers or whatever is needed. We have started using clear fishing line to simulate DMX runs. We teach basics such as the fact that you can only daisychain 16 fixtures in a row, how many of each fixture can fit in 512 channels, why we need opto splitters. Things they might not teach you in normal theater lighting classes.”
Ronn lets us know that he can 3D print an entire lighting system for about $50 to $75. He charges his class attendees a $30 lab fee to help offset costs of everything they work on during the course. He’s actually put his fixtures online. “People can download them and play around if they’d like. Like I said, the more kids we can teach this stuff to, the better.”
Ronn can be reached at rcampbell@columbiabasin.edu. To obtain the files to 3D print the symbols Ronn uses, go to https://www.thingiverse.com/Ronnskull/designs.
